Friday With Fiona – Give It A Whirl!
Hello everyone and welcome back to Friday with Fiona!
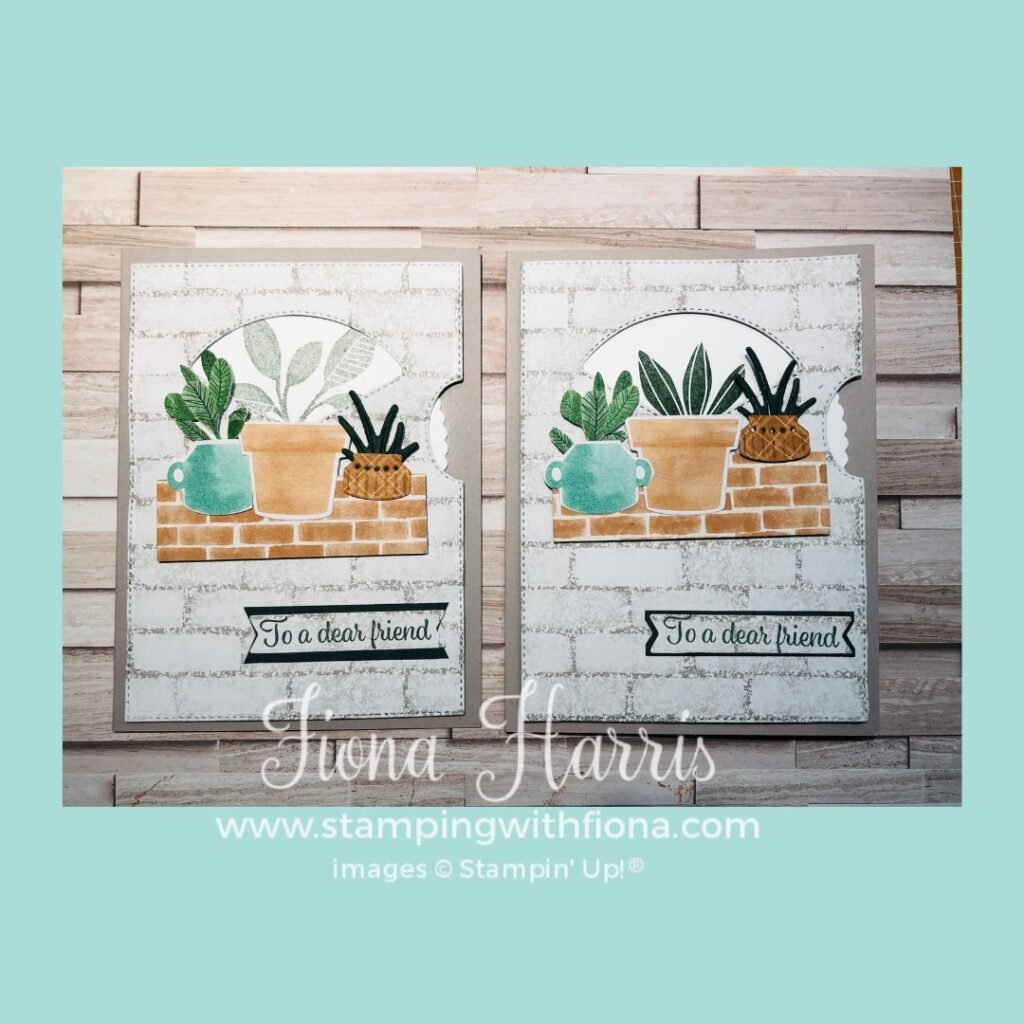
Every week, I pick a product and design projects with it and show you how to make them during a Live. This week, I’ll be using the Cactus Cuties stamp set with the Give It A Whirl dies and the Bloom Where You’re Planted Designer Series Paper which is retiring soon and is on sale on the Last Chance List- get it while you can.
In case you’ve never joined me for Friday with Fiona, I go live every week, typically Fridays at 2:00 pm BST, on my StampingwithFiona Group with the projects. Everyone is welcome to join my Group.
If you are unable to join me live, I will upload the recording here afterwards.
You will need the Cactus Cuties stamp set, cardstock, Designer Series paper and adhesive to complete your projects if you want to, or you can use what you already have with the Give It A Whirl Dies.
Measurements & Instructions:
STAMPS
Cactus Cuties 158056
PAPER
Evening Evergreen 155575, Gray Granite 147008, Basic White 159228, Bloom Where You’re Planted Designer Series Paper 155696.
INK
Evening Evergreen 155575.
ADHESIVES
Stampin” Seal 152813, Foam Adhesive Strips 152815, Stampin” Dimensionals 104430.
TOOLS
Give It A Whirl Dies 154336. Perfect Plants 155562.
EMBELLISHMENTS
Instructions:
- Cut Gray Granite card to 14 cm x 21 cm and score in half at 10.5 cm.
- Die cut a piece of Bloom Where You’re Planted Designer Series Paper with the Give It A Whirl Rectangle Die.
- Die cut the circle with the Give It A Whirl Die.
- Stamp the sentiment onto a pice of Designer Series Paper and glue to Evening Evergreen strip of card and glue to Designer Series paper.
- Stamp the plant images on to the Basic White Circle in relevant third.
- Place a brad through the Designer Series Paper and Basic White circle.
- Cut a pice of Brick Designer Series Paper 2.5 cm x 7.5 cm. Glue to the rectangle to cover the brad using Stampin’ Dimensionals and add the pots and two plants.
- Glue the Rectangle to the card b are using Foam Adhesive strips. Check that the wheel can turn.

